Thursday, August 20, 2015

Gluten Free Strawberry Shortcake in a mug!

Ok, so I had a sweet craving the other night, and not having many options, I tried this out, and it was really good! I found a recipe online for a cake in a mug kind of thing, an revamped it a little and I really liked it. One thing I have found is many gluten free desserts call for so much sugar, like this one, a whole whopping 3 TBSP! I mean that is in one serving.....and I just couldn't bring myself to use that much so I used just 1 TBSP (still feeling guilty). I grew up on homemade shortcake, and it was never super sweet so I figured it should be fine and it was. Eventually I will find some other way to substitute, but like my previous post, I am still in that "going Gluten free starvation mode" so I guess  I just haven't had the patience yet.

Above you will see in my picture (I know, not the best pic, I just shot it with my phone really fast) that I used a ramekin instead of a mug...so to each his own, they both work great. I want to mention also, this is an individual serving, but I think it can be two servings. I am usually full half way through eating it and save the rest for later.

So, here we go....grab a 12 oz mug or ramekin and a small mixing bowl:

Add to mug/ramekin:
2 TBSP coconut oil
1 TBSP sugar
and melt in microwave about 30 seconds, stir until blended

Whisk in separate mixing bowl:
1/4 cup + 2 TBSP gluten free flour mix
3/8 tsp gluten free baking powder
pinch of salt

Make a well in flour mixture and pour in:
3 1/2 TBSP Almond milk
1/8 tsp vanilla

Mix until blended, then add the oil/sugar mixture and stir until blended.
Pour a little batter into mug/ramekin (which will be pre-oiled from your sugar oil mixture!) put your strawberries on top, then top with remaining batter (see pic below)

This is when you put in the microwave for about 120 seconds. If center isn't set you can do another 10 seconds until it is done. We are talking maybe 5 minutes total for a sweet treat. 
Take it out, let it cool a tad, and enjoy!
Oh, and I did this with blueberries the other day as well.....soooo good!


Tuesday, August 18, 2015

Gluten Free powerballs

So, here is an oldie but goody. I just LOVE powerballs and so do my kids. School is back in session and these are perfect before, during, and after school treats! My son doesn't like to eat super early so these are great to throw in his bag for school. I'm always trying to make him take a banana or something, but these are packed full of goodness, they are great. (and great for mom who needs a pick me up here or there during the day as well!)

I used about: 1 cup Gluten Free Oats,  1/3 cup ground flax seed, 1/3 cup organic unsweetened shredded coconut, 3 TBSP virgin organic coconut oil, 1 tsp cinnamon, 2 TBSP honey, 1/2 cup gluten free peanut butter, 1/4 cup dark chocolate chips, and 1 1/2 TBSP chia seeds
Now above I put "I used about" because that's just it, there really isn't a set amount  you have to go by. You just need to have the right ratio of wet-to-dry ingredients for binding purposes. 


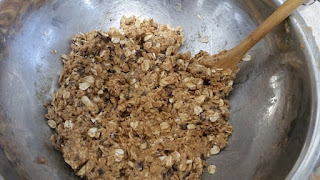
 Put all of your ingredients in a large mixing bowl.


Start mixing....
until well blended.....
scoop with cookie scoop onto parchment (or you can use a spoon if you don't have a scoop and roll into balls) I let them sit for about 30 minutes.
These power balls were still pretty soft and sticky, so I put some more of the flake coconut in a baggie, dropped a few balls in....

....and shook until coated.


Now see how long they last!


Monday, August 17, 2015

To Gluten or not to Gluten……

So, I have been suffering from digestion issues for many years now. Even before I became a Pastry Chef, I had been through the ringer with different test ordered by my GI doctor. Never in my life did I think I would actually consider giving up gluten…..and I would find it to be the bane of my existence.

I actually became much worse than usual this last year. In a doctor’s appointment recently my doctor suggested I try going Gluten Free for at least 2 weeks and see if it made any difference.  Now I have had doctors/nurses mention this before, but I’m like, no way, how in the world can I make that work? I’m a Pastry Chef, and not to mention, bread has been a staple in my diet my whole life.  I mean Ha really, that is just a bad joke!

Within two days of omitting gluten from my diet completely,  I noticed a difference. I had one night where gluten sneaked into one of my recipes (still learning how much gluten is in everything!) and the next day I was so sick to my stomach and just downright miserable.  I was keeping a food diary to see what helped and so I could jot down the recipes I tried and what I liked, and didn’t, or what my family liked as well. I highly recommend doing this if you try a gluten free trial. It is the only way I knew what I had eaten the day before that made me sick. It was soy sauce, by the way, I had no idea wheat was in soy sauce! I also want to mention, my mental clarity picked up, as well as my fatigue is slowly dissipating. My daily yawning quota  seems to have been cut in half!

Anyway, I write all this because I have decided to start blogging again, but it is going to be centered around Gluten Free ideas, recipes, and how to cook for a family of 5 when you have to go gluten free. That is not the easiest task by the way, when there are those family favorites, that you just can’t take away from everyone just because you can’t have them.  But it is quite a task when you are the cook, and tasting while cooking plays a huge part, so it makes it a little more difficult when you can’t taste what your cooking if it has gluten in it.

I have always looked for the healthier way to bake/cook, but this is a whole new ball game. Let me tell you, Gluten Free does not always mean “healthy” and I have learned some of the unhealthy Gluten Free foods I am allowed, so lets just say I am on a mission! If you try going gluten free, one thing I will warn is you will feel hungry all of the time, at least that is what I am experiencing right now. I have read more about it, and it is almost like your body is going through a detox from gluten.  If you have done a sugar detox, you know what it can do. Well it can kind of be like that. Some articles I have read talk about “the storm before the calm” For some people it can take a few days to recover from the detox and you can have all sorts of symptoms until you feel better, but then it is so worth it and you feel  great! I will tell you, except for the hunger and maybe being a little extra achey, I haven’t had any horrible side effects.

Now, I did read that for some people, this hunger can last up to 3 months. I have basically adapted the 6 (or so) small meals (or snacks) a day thing. I may feel like I’m starving, but then when I go to eat something, a handful of nuts, grapes, cheese,  just a simple little snack eases  off the hunger. So, although you want to eat all the time, you are not eating too much. Although, it is easy to grab the wrong thing when your starving because there are so many processed GF snacks out there (including potato chips!) So that is my goal, yummy gluten free foods that my family will love and that I won’t feel  guilty eating, and neither will you! Recipes soon to follow…..


Wednesday, February 18, 2015

Making babies!

So, I can't even count how many times I have come into my blog to post, and now have some half written blog post saved in my file because something always comes up, and I keep trying to get back to it, but just haven't finished yet! I had some heart healthy kitchen staples that I was going to have posted for Valentines week, but then, well, life just happened, and my kids needed goodies made for parties, valentines made (I did post those!) and between practices, then with wrestling tournaments to go to, time just got away. I'm pretty sure my profile states I have three kids, so any of you moms reading this, I know you understand :0)

So, anyway, I had orders to get done, and I thought I would just throw in a fun post of what I was doing today.....
Making babies!
 I know, I know, your probably like.....

But, seriously, one of my favorite little fondant figures I make are these sweet little babies. 


These are made of fondant/gumpaste and have such intricate detail, and are adorable for baby showers, birthdays, and more. I custom make these, and one of my customers order wants diapers on a few of them, so I have to go make some cute little diapers to cover their bottoms. As you can see, I am half way done, so I have to get back to work! Have a wonderful Wednesday!


Thursday, February 12, 2015

I mustache you a question.....

I mustache you a question.....do you love valentines day?? I do!.... so rolling on with this weeks valentines theme, here are my daughters valentines we are finally finishing up! Soooo cute and super easy!


These are a mix of lips and mustaches, attached to a sucker so when they suck on them you will see their glitter lips or glitter-stache! 

Here is what you need:
~piece of card stock or heavy paper to trace
~foam paper, color of choice. which sticky backing
~suckers
~scissors
~pen


Directions:
Step one- draw your mustache and lips on your card stock paper and cut shapes out.
Step two- trace shapes on the back of the foam, on the sticky paper side
Step three- cut shapes out
Step four- have your child write their valentines names on the paper part on the back
Step five- poke a hole in the middle and put the sucker stick through
Oh, and once they are done with their sucker, they can peel off the backing and still wear the lips or mustache!

We had such a mustach-tic time making these!


Wednesday, February 11, 2015

You color my world Valentine!


So Valentines day is 3 days away, so I thought it would be fun to show you some valentine ideas for your kiddos. We LOVE making homemade valentines, well, I should say my girls and I love to. My oldest is past that stage now! I didn't get pics of all the steps,  but it is super easy.

What you need:

~silicone mold with shapes you want them to be (we had ice cube flower molds that we used)
~different color crayons (new or old)
~baking sheet
~construction paper
~Mounting foam circles, or glue dots
~marker

Directions:
~preheat your oven at 250
~Chop up old crayons in little pieces,  pick out your colors carefully so you get the right color contrast you want. (my oldest daughter was very particular about those!)
~have your child fill silicone molds with crayon pieces all the way to the top, they love this part:0) (they will condense down when melting so don't be scared to overfill a little)
~put silicone mold on baking sheet and put in oven for about 15-25 minutes, until completely melted.
~once melted set on counter for about 15 minutes to cool, then in freezer for another 15 minutes
~when you take them out run some warm water over the back of your mold for a minute and then pop them out! Now aren't they adorable!!!

~OK, now the other part is just as easy. Decide what shape you want your paper part to be and cut out your shapes.
~Now write your saying around the edges, for example we chose: "You color my world Valentine!"
~I wrote the sayings for my daughter on the front side, while she signed her name on the back and wrote a note to each of her friends. Make sure to have your child do that before attaching the crayon mold.
~Next, she pulled off the foam mounting circles and stuck them to the back of the crayons, then pulled off backing and stuck them to the paper cutouts.

Simple and easy! Stay tuned for my other daughters valentines: Lips and Mustaches!


Friday, February 6, 2015

Gluten Free Coconut Blueberry pancakes

OK, so with the weekend coming I thought a pancake post would be appropriate, especially when that seems to be one of the only times I get the family together to make breakfast. (well not this weekend, we have tournaments all weekend!) But, anyways, this is another oldie but goodie from my old blog, and so I am going to find time to squeeze these in somewhere this weekend. Mmmmm how about breakfast for dinner!

I was super excited the first time I came across coconut flour while shopping for new flour substitutes to try. I love love LOVE basically anything coconut as it is! So, after buying it, I went home and got on the computer and started my research on coconut flour.

OK, so, coconut flour is a soft flour produced from dried coconut meat. Apparently you can make it on your own, but for now i will choose to just purchase it, and not tackle that beast, well, not yet that is! Coconut flour has so many health benefits, being rich in protein and fiber, how can you go wrong :0)

Now here are some things you should know when baking with coconut flour, for one, it is super absorbent. You cannot just substitute coconut flour 1:1 ratio for other wheat or other grain-based flours. You should usually use about 1/4-1/3 cup coconut flour for every 1 cup grain based flour. You will also need to use more eggs, for example, every 1 cup coconut flour you use, you will need to use like 6 beaten eggs in addition to approximately one cup liquid such a coconut milk. I strongly suggest starting out with recipes that people have already used successfully when trying your hand at it at first, instead of just experimenting, as it is not cheap, and you could end up being disappointed, and alot of money down the drain :0(

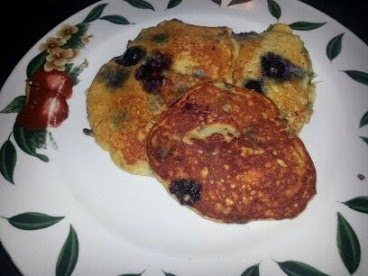
So, speaking of a well used recipe, the first one I tried was one I found for chocolate chip coconut pancakes online. It looked great so I tried it out and it was good, but  I love blueberries so I took the base of that recipe, and tweaked it some, added blueberries instead of chocolate chips, and it was sooooo yummy! (not to mention, I think the blueberries make it a little more moist) I snapped a picture of the pancakes, and as you can see I am not the best food photographer, but delicious doesn't have to mean pretty :0)

So without further adieu, here is the recipe:

Chef Cher's Gluten Free Coconut blueberry pancakes.


5 eggs separated
5 TBSP coconut oil, melted
1/3 cup almond or coconut milk room temp
2 TBSP Honey
1/2 tsp salt
1 tsp vanilla extract
1/3 cup + 1 TBSP coconut flour
1 TBSP ground flax seed
1/2 tsp baking powder
1 cup blueberries
coconut oil cooking spray


Mix melted coconut oil, milk, honey, and vanilla in small bowl. (make sure your milk is room temperature or your coconut oil will seize up)

Mix dry ingredients together in another bowl.

Separate eggs into separate mixing bowls.

Beat egg whites to soft peaks, then beat egg yolks until thick and creamy.

Mix liquid ingredients into egg yolks. Fold egg yolk mixture into egg whites.

Whisk dry ingredients into egg mixture.

Spoon about 1/4 cup batter onto preheated pan or griddle.

Sprinkle blueberries on each pancake.

NOW...this is where the patience part comes in...(which I really lack!!)

Give them a few minutes and until they become kind of puffy before your flip. (my first set were quite messy due to my lack of patience!)

Let me know how they turn out for you!

Wednesday, February 4, 2015

My "dark" secret

So, we generally eat healthy around our house, and I don't buy a lot of sweets, but lately I have been cutting all added sugars which can be quite a difficult task I have come to find. An article I read the other day said that when you set your new diet goals, you should hit it hard at 90% and give yourself a 10% cheat. I liked this idea, and didn't want to go too crazy, but I knew I needed some kind of sweet fix here or there as a reward. So whether you are looking for your own sweet fix, or just want a healthier treat, here is my "dark" secret, so simple, and so delicious!


Yep, dark chocolate and peanut butter!

Here some tidbits on dark chocolate that you may not know:
Lower Blood Pressure

Studies have shown that if you eat small amounts of dark chocolate 2-3 times a week, it can help lower your blood pressure. It improves your blood flow which may help prevent the formation of blood clots. It may also prevent arteriosclerosis (this is hardening of the arteries)

Loaded with Antioxidants

Antioxidants gobble up free radicals, destructive molecules which are known in heart disease and other ailments. Free radicals are implicated in the aging process and may be a cause of cancer, so therefor eating foods high in antioxidants can protect you from many types of cancer and slow down the signs of aging.

Helps control blood sugar

The flavanoids in dark chocolate are said to help reduce insulin resistance by helping your cells to function normally and regain the ability to use your body's insulin efficiently. Dark chocolate also has a low glycemic index, so it won't cause huge spikes in blood sugar levels.

High in Vitamins and Minerals

Dark chocolate also has a number of vitamins and minerals to support your health. In high concentrations includes: potassium, copper, magnesium, and iron. The potassium and copper help prevent against stroke and other cardiovascular ailments. The magnesium helps in preventing type 2 diabetes, high blood pressure and heart disease, and the iron helps aid against iron deficiency anemia. 

And believe it or not, peanut butter has health benefits too! 

Energy
High in calories, but in moderation of course, it packs in the nutrition as well. It contains both protein and healthy monosaturated fats which will give you that great energy pick-me-up you are looking for. Peanut butter also has other nutrients like manganese, tryptophan, and vitamin B3.

Protein

Their are 7 grams of protein in each 2 TBSP serving of peanut butter. The amino acids found in protein are what your body uses to build and repair muscle tissue.  Additionally building metabolism boosting muscles, protein rich foods like peanut butter help you feel fuller longer.

Monosaturated fats

This type of fat can help reduce the bad cholesterol levels in your blood which can help in lowering your risk of heart disease and stroke. It also provides nutrients that aid in developing and maintaining your body's cells. Oils rich in monosaturated fats also add vitamin E to the diet, which is an antioxidant vitamin most Americans need more of.

Potassium

So excess sodium in our diets puts stress on our cardiovascular system, but potassium can counter act the negative effects of sodium. It also helps in heart function as well as  helps your nerves function properly. Consuming 2 tablespoons of peanut butter will boost your potassium intake by 238 milligrams.


Now obviously I am not a doctor, and this is my own research I have done. I absolutely love this treat, whether I indulge in a piece with peanut butter or not, in moderation its great all around! I know alot of people don't care for dark chocolate because of its bitterness, but you can start at a lower percent, like for example I started at 53% cacao (not cocoa). I am gradually working up to get my taste buds used to it. The higher percent the more cacoa, so the best for you is 70% cacao content or higher, rich in flavor and rich in flavanoids.




Monday, February 2, 2015

Guilt Free Flourless Chocolate chip protein blond brownie


OK, so I have a treat for you!! If you need a little sweet fix, without all the guilt, then this is a great recipe, loaded with proteins, and low in fat without all the refined sugars. I tried it on my family (they are my best critics!) 
I told them before we ate it, not to expect it to be super sweet, since it does not have any sugar in it. They took a bite, gobbled it down, and asked for another peice! Then when my kids asked if they could take it to school for a snack the next day, I was super excited. I love finding recipes like this to add to my box of Kirby family approved recipes! I had found a recipe awhile back and altered it a little bit to my liking (and my pantry supply) For example, the original called for peanut butter, and all I had was Almond butter, so I used it and it turned out great, so don't be scared to change it up!

This only takes a few minutes to throw together, and about 30 minutes to bake. You can make them thinner in a square 8x8 pan, or round like mine in a 8" round (thicker)

Get your food processor out and add these ingredients:
1 cup Almond butter (again, you can use any nut butter, or seed butter here)
1/3 cup honey (agave or maple syrup)
1 egg
2 egg whites
1/4 tsp salt
1/2 tsp soda
1 1/2 cups cooked chickpeas
1 tsp vanilla

Now hit the start button, and blend until smooth.
Take the blade out and stir in 1/2 cup dark chocolate chips (I left a few out to sprinkle on top)
Pour into prepared pan and bake about 30 minutes or until your tester comes out clean.


Tuesday, January 27, 2015

Powerballs!!


OK, talk about an amazing snack for you and the kiddos! I love finding different healthy snack ideas to throw in the gym bag for an all day basketball or wrestling tournament, or for just an after school snack. 
These are packed full of amazing superfoods, you can feel guilt free popping a few of these in your mouth! There are tons of recipes out there for powerballs, and really, you can make concoctions of many different ingredients. They are a great snack for you or your kiddos that pack a great nutritious punch of protein.

Here is an oldie but goodie, a recipe I made with the kids that I wrote on my old blog last year:

1 cup peanut butter
1 cup honey
3 cups oats
1 1/2 TBSP Hemp seeds  (love these!...amazing super food! a complete protein, and rich in minerals!)
1 1/2 TBSP Chia seeds (another complete protein high in antioxidants, amongst other things)
about 1/2 cup sliced almonds
3 TBSP ground flax seed (ground is better than whole, your body absorbs them easier)
1 cup coconut
Add all of the dry ingredients in a large bowl. Pour honey and peanut butter in a separate bowl and mix until smooth. I use a raw wildflower honey that I buy from a local bee farmer. Processed honey is heated and filtered, robbing it of its natural ingredients. 
Raw honey is powerful for your immune system. It contains 27 minerals, 22 amino acids, and 5,000 enzymes. Just one daily spoonful in your diet is all you need to get these benefits!
Now add the peanut butter mixture into the oat/nut mixture and stir until combined. It should resemble a thick cookie dough mixture.
Now roll into balls of desired size. I prefer the small bite sized. The kids made these with me this time and wanted to help, so I let them. I told them to finish rolling and came back a few minutes later to see Cody's bite sized are a little bigger than some. I love my kids!

Anyway, after you have rolled them they are ready to eat! I like to let them sit on a cookie sheet for like an hour to get a little firm, then store in a tupperware container. They can last well over a month, but I can guarantee they won't last that long, and least they never have in our house!

Monday, January 26, 2015

My big UGLY green smoothie!

So, I love, love, love making a good protein smoothie in the morning, or after a good workout, but most of the time they are really just plain ugly looking!  It doesn't bother me, but when I make them for my kids, I usually have to try to dress them up a little bit, or use certain fruits to make a good color.

This is my smoothie recipe this morning, I forgot to get a picture of it after it was made, but well, that is where my Ugly smoothie title came from today. It was delish, but not pretty!


1 TBSP raw shelled hemp seeds
1 ripe banana
1 TBSP chia seeds
1 cup raw kale
1/2 cup water
1/8 cup greek yogurt
5 frozen strawberries

Throw in the blender and blend until smooth. Enjoy!

Friday, January 23, 2015

Happy Friday!


Ever have one of these days? I know I do, Happy Friday everyone!
Have a great weekend!


Thursday, January 22, 2015

Cinnamon Roll Breakfast Cake!

So what a better way to bring back my blog, then to post something super yummy! I posted this one on my old blog awhile back when I thought I would try using my blog page from my website, and well, lets just say this simple minded momma still loves blogger! So I am back on here, and so I don't lose my old blogs and recipes I will repost them on this one periodically. If you followed the blog on my website, it will soon start redirecting to this page, so now I can actually start posting more often again :0) 
OMahhhGoodness!! That's all I can say. Soooo good. I have seen a few recipe's before for similar things, and this morning my youngest wakes me up (we were sleeping in for once!) and she say's, "mommy, aren't you going to get up and make something yummy for breakfast??" My husband had mention cinnamon rolls this week, and that is my daughters favorite, but I was so not in the mood to make cinnamon roll dough, wait for it to rise, roll it out, fill, cut, let rise...and so on. So Kylee and I gathered our ingredients to make something a little more simple and quicker. So, we mixed and mixed and poured, and then cuddled up on the couch and watched cartoons while it baked for 30 minutes.  Now, this isn't a healthy recipe by any means, kinda one of those special occasion or special treat for breakfast mornings!
Try it out, and let me know what you think!!
Preheat your oven to 350 degrees and spray a 9x13 baking dish.
Gather your cake ingredients:
3 Cups AP flour
1/4 tsp salt
1 cup sugar
4 tsp baking powder
1/2 tsp cinnamon
1 1/2 cups milk
2 eggs
2 tsp vanilla
1/2 cup butter (melted)
Whisk the dry ingredients together. In a separate bowl mix the milk eggs and vanilla together. Pour liquid mixture into dry mixture while whisking until fully incorporated. Then slowly pour the butter into mixture while whisking until you have a smooth batter. Do not over beat. Pour into 9x13 baking dish. Now prepare brown sugar topping.
Cinnamon-brown sugar topping:
3/4 cup butter (melted)
1 cup brown sugar
2 TBSP flour
1 TBSP cinnamon
Mix all above ingredients together until smooth. Drop by large spoon fulls on batter. Use a butter knife and swirl mixture around in cake batter.
Bake at 350 for about 30-40 minutes.
Cream cheese frosting:
3 ounce cream cheese
1 ounce butter
1/4 cup powdered sugar
1/2 tsp vanilla
Beat frosting ingredients together and spread over hot cake. Serve immediately!